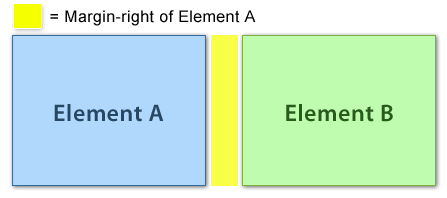
As you begin designing layouts with CSS you will inevitably need to create spacing between elements; thus, today’s lesson is regarding the “margin” property. Let’s begin with a quick image to illustrate the margin property in action:

Margin is space added to the outside of an element (past the element’s edge, or border). In some instances, Padding and Margin can be used to achieve a similar affect, but it’s important to understand the difference. Padding adds space to the inside of an element, while margin adds space to the outside of an element.
Let’s code a simple example of margin in action. Begin with the following HTML code, and place it in a blank XHTML starter file.
<div id="box-a">
<p>Box A</p>
</div>

<div id="box-b">
<p>Box B</p>
</div>
Next, let’s give these two boxes a width, background-color, a border and padding. Add the following code to your CSS file:
#box-a {
    width: 300px;
    padding: 15px;
    background-color: orange;
    border: 1px solid black;
}

#box-b {
    width: 300px;
    padding: 15px;
    background-color: gray;
    border: 1px solid black;
}
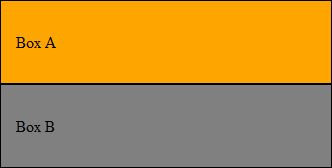
When viewed in a web browser, our example should look like this:

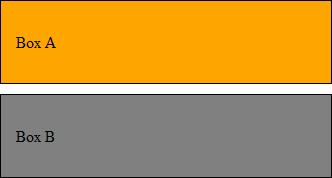
Now imagine we want to create 10 pixels of spacing between the two boxes. We would achieve this by adding bottom-margin to box-a:
#box-a {
    margin-bottom: 10px;
    width: 300px;
    padding: 15px;
    background-color: orange;
    border: 1px solid black;
}
When refreshed in our web browser, our page should now look like this:

You may wonder, “Could we have also added margin-top to box-b?” Let’s do that now; let’s double the space between the boxes by adding another 10 pixels of margin to box-b:
#box-b {
    margin-top: 10px;
    width: 300px;
    padding: 15px;
    background-color: orange;
    border: 1px solid black;
}
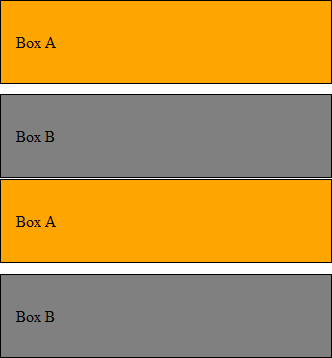
When you refresh the page in your web browser, you’ll notice that the spacing didn’t double; it stayed exactly the same. This is because two margins are touching, so one collapsed. Essentially, when two margins touch the larger margin is used, and the smaller disappears (or collapses).
To fully illustrate this point, let’s change the margin-top of box-b from 10 pixels to 11. When we refresh the page in our web browser we’ll notice that the spacing hasn’t ballooned to 21 pixels, but instead has increased by only one pixel.

The browser uses the 11 pixel margin of box-b and collapses the smaller 10 pixel margin of box-a.
That’s all for today’s lesson. To recap, you now know:
- The difference between margin and padding
- How to use margins to create spacing around elements
- How the smaller of two touching margins collapses
If you prefer to watch video lessons instead of reading written lessons check out my 8 hour video course and learn pro-level HTML, CSS, and responsive design.


thanks for these written tutorials. I have been through several html/css courses, mostly video, I find each persons style helpful and unique and more and more sticks each time I watch. I have found your tutorials – these ones here, written up, really helpful as I go at my own pace and don’t keep having to stop and start video. thanks again for your kind efforts. BTW I discovered SASS today…hope to find some stuff on that when I get through the basics here.
name of “ID” could be any words or there is specific words to be used???
Thank u very much !
Bookmarked your blog for future references 🙂
Now I am going to understand The Box Model truely.
Thank u very much !
moving to next class .
Kind Regards ,
Daniel.