In our previous lesson we learned the basic syntax of CSS code. We are now able to apply basic styles like defining a color or center aligning text. But before we can learn advanced CSS techniques we must study what is known as “The CSS Box Model.”
Elements Are Rectangles
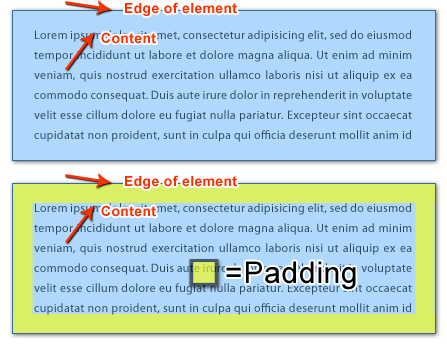
First, you will need to begin thinking of every XHTML element as a rectangle (or box). We style our boxes by assigning properties such as widths, margins, borders and padding. Our goal for today is to understand the CSS property “padding” and how it affects our elements. I have created a graphic to help visualize the padding property:

As the graphic hopefully conveys, padding is used to create space between the edge of our HTML element, and the content (usually text) that the element houses.
Padding Affects The Width of Elements
One of the trickiest aspects of CSS is keeping track of the “true” width of your elements. For example, how do things like padding, borders and margins affect the width of an element? Let’s begin coding to discover our answer. I encourage you to follow along in your own text editor.
Our First <div> Is Our Base
First, let’s create a <div> element with an ID of “base” and include some text inside of it. Here’s the XHTML code we’ll insert into a new web page.
<div id="base">
    This is 300 pixels wide.
</div>
Now, let’s make our “base” 300 pixels wide and give it a background color so we can easily see its width in our web browser. Here is the CSS code we’ll insert into our CSS file:
#base {
    width: 300px;
    background-color: yellow;
}

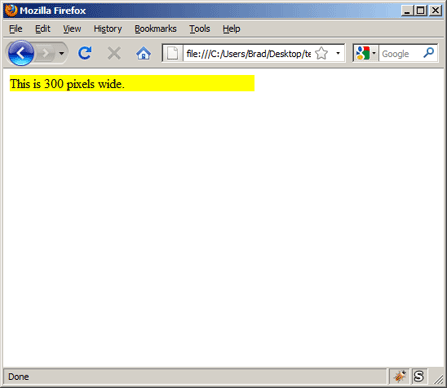
Now if we view our webpage in a web browser we’ll see a yellow box which measures 300 pixels wide.
The “Experiment” <div>
Let’s create a second <div> with an ID of “experiment” and place it directly below our base. We’ll use this new <div> to test properties like padding, margin, and border. Here is the XHTML code you’ll add:
<div id="experiment">
    This is the experiment.
</div>
Next, we’ll give our experiment <div> a width of 300 pixels, a background color of orange, and 10 pixels of padding:
#experiment {
    width: 300px;
    background-color: orange;
    padding:  10px;
}

Unequal Widths
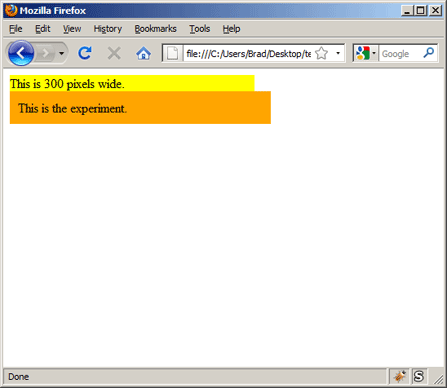
When we refresh our page in a web browser we see that our new orange <div> is wider than our first <div>. We assigned it the same width of 300 pixels but our 10 pixels of padding tipped the scales. Notice how our text in the orange box is 10 pixels inside the left edge of the <div> element? There is also 10 pixels of padding on the right side of our box, so overall our new box is 20 pixels wider than our gray base.
Making the Widths Equal
Let’s pretend we want our orange <div> to match our gray <div> in width. This requires us to lower the width value of the orange <div> by 20 pixels to compensate for the padding we added. Let’s edit our CSS width declaration for our experiment <div>:
#experiment {
    width: 280px;
    background-color: orange;
    padding:  10px;
}

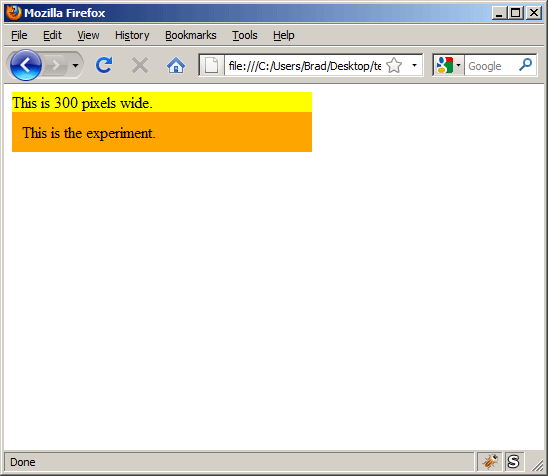
When we refresh our page in a web browser we see that the two <div> elements are now equal in width. We now have a basic understanding of how the “padding” property works. It gives the content inside an element, in this case our text, room to breathe from the edge of the element. Padding also changes the width of an element and we learned how to use some basic arithmetic to keep our elements even.
In our next lesson we will continue to examine the CSS Box Model by learning about the “margin” property.
If you prefer to watch video lessons instead of reading written lessons check out my 8 hour video course and learn pro-level HTML, CSS, and responsive design.


Great lesson 🙂 Just so you know, when you copy your CSS for “experiment”, it pastes like this:
padding: 10px;
In other words, the “ ” is added in, and it messes up the result. If you type in the CSS to match what is on-screen, it works perfectly. Just wanted to let you know!
Hi Kelly,
Thanks for the kind words! Regarding copying and pasting the sample code: if you hover over the sample code box you should see a few icons appear in the top right corner of the code box. The icon on the left will open a window with code that can be perfectly copied and pasted. The second icon will automatically copy the code to your clipboard for you to paste.
Thanks!
Brad
Thanks!
Great site – really, really helpful.
I think there’s some mistakes in the above text where you say “…our new box is 20 pixels wider than our gray base” and “…we want our orange to match our gray …”
I think you mean yellow – not gray – or have I completely misunderstood the points ?
I don’t see gray on any of the web browser screens (excluding the browser structure).
Cheers,
Andy.
your website is so helpful. thank you! 🙂
graduating to next class
Thanks alot Brad